
Product Details
Stitched in Crime (A Craft Fair Knitters Mystery Book 2)
Free Shipping+Easy returns
Product Details
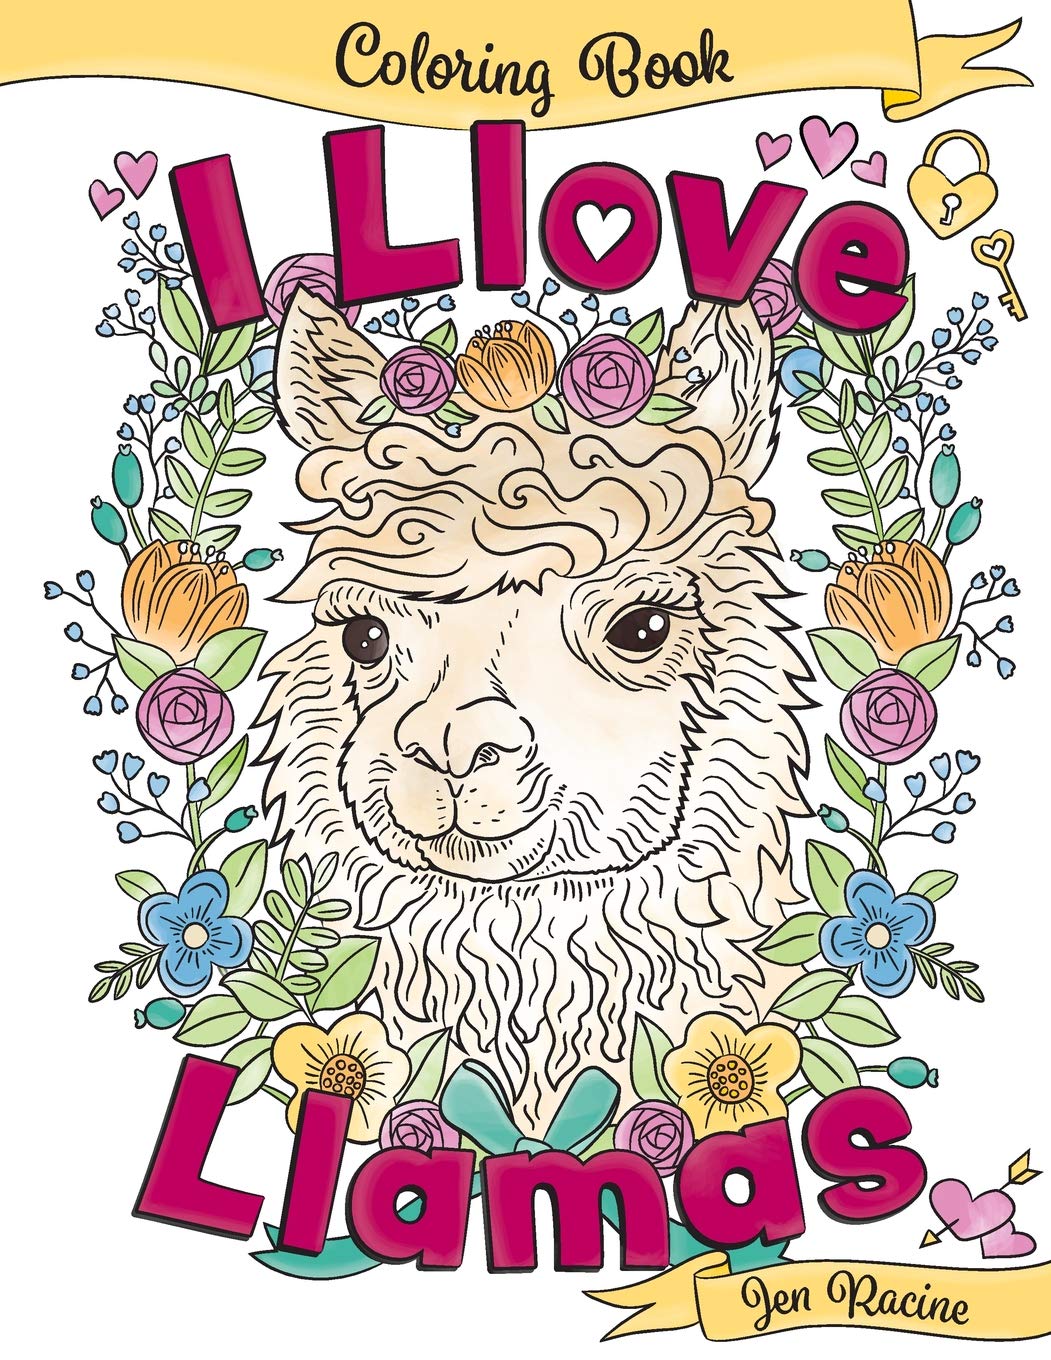
I Llove Llamas Coloring Book (I Love Coloring Books) (Volume 1)
Free Shipping+Easy returns

Product Details
Crochet Characters Winnie the Pooh: All Stuffed with Fluff! Everything You Need to Make Pooh and Piglet
Free Shipping+Easy returns

Product Details
DARN GOOD YARN one of a kind | DIY knitting kit – fox stuffed animal knit & crochet kit | craft amigurumi knit and crochet…
Free Shipping+Easy returns

Product Details
FRILY – Small Lazy Sloth (7" Tall) – 100% Handmade – Knitted Crochet Stuffed Animal – Handmade Cotton Yarn – Plush Animal …
Free Shipping+Easy returns

Product Details
5-pack or 15 Multi Size Organic Short Sleeve Onesies Bodysuits
Free Shipping+Easy returns

Product Details
FRILY Dodo Squirrel – Small Squirrel Amigurumi Stuffed Animal – Knitted Crochet Toy for Kindergarteners, Girls, Boys and A…
Free Shipping+Easy returns

Product Details
Living Textiles Grey Theodore Elephant Plush (Knit)
Free Shipping+Easy returns

Product Details
FRILY Peter Rabbit – Bunny Amigurumi Stuffed Animal – Knitted Crochet Toy for Babies, Kindergarteners, Girls, Boys and Adu…
Free Shipping+Easy returns

Product Details
Craft-tastic I Love Llamas – Craft Kit for Kids – Everything Included for 6 Fun DIY Colorful Art & Crafts Projects
Free Shipping+Easy returns

Product Details
Matissa Newborn Baby Girl/Boy Crochet Knit Costume Photography Prop Hats Outfits
Free Shipping+Easy returns
Crafty Stuuuf

Amigurumi free patterns and step-by-step crochet tutorials… One of the free amigurumi crochet patterns we will share today is the amigurumi Llama, whose photos and design belong to Anna Timonova. You can learn how to crochet these Llama using the free amigurumi pattern.
Hækle

Crochet llama patterns are some of the cutest patterns you’ll find. What’s not to love about a soft and fluffy crochet llama project?
Crochet patterns llama. Set crochet animals amigurumi pattern instant download

Plush llama and white amigurumi Llama crochet pattern. Please note: Purchase of this item is for a digital PDF Crochet Pattern, not the actual finished toy in the photos! Patterns is written in standard US terms. Set of two crochet toys patterns – LLAMA and White LLama at a bargain price! You can read more about each pattern here: Plush LLama crochet pattern: https://www.etsy.com/NataleKnitting/listing/777972434 ** You get tutorial PDF file with embedded bookmarks (content): – 18 pages (with cover); – 31 photos. (The toy LLama will be about 9.9\
sew-good

Everyone loves llamas right? Personally, I prefer alpacas, they are smaller and sweeter than a llama, but llamas are cute too! This pattern will help you crochet the cutest llamas ever! AUKILLU The pattern says
Wzory szydełkowe

Crochet your own little llama (or alpaca) with my new amigurumi llama pattern
LLama and Baby LLama CROCHET PATTERNS. Crochet animals amigurumi pattern

Plush llama and Baby Llama crochet pattern. Please note: Purchase of this item is for a digital PDF Crochet Pattern, not the actual finished toy in the photos! Patterns is written in standard US terms. Set of two crochet toys patterns – LLAMA and Baby LLama at a bargain price! You can read more about each pattern here: Plush LLama crochet pattern: https://www.etsy.com/NataleKnitting/listing/777972434 ** You get tutorial PDF file with embedded bookmarks (content): – 18 pages (with cover); – 31 photos. (The toy LLama will be about 9.9\
hackovanie

This post contains affiliate links, please see our disclosure for more information. Thank you so much for supporting Grace and Yarn! Happy Friday friends! I’m so excited to share this free crochet llama pillow pattern with you! Last year I came out with our amigurumi llama pattern and earlier this year the mini llama pattern! Still feeling the llama craze I have always wanted to make a pillow! When brainstorming for the 2nd annual 30 Days of Cozy event I knew this was what I wanted to work up. There’s something so exciting about watching a project come to life from a picture you have in your imagination. While I’ve made my pillow to be a llama it’s super versatile! With some color changes and slight modifications you can have a fun horse or unicorn too! Ooh in rainbow colors! For this pattern I used a new yarn t
hat I loved so much I went back and bought more for another project I hope to share with you later this Winter! It’s Yarn Bee Denim in Color and I used the shade Ivory. You can find them at your local Hobby Lobby store in a few other fun colors too! I used two skeins and had a little bit left over when I was finished. You’ll also need a small amount of brown (for the ears and nose), pink (or red) for the cheeks, plus black and white for the eyes. The bow is optional so feel free to grab your favorite color. For a boy version you can use it as a bow tie and sew onto the bottom of the pillow! Pattern PIN it here to save for later! Grab an ad-free PDF version in my Etsy or Ravelry shop! You may make and sell items made from this pattern but please do not sell, share or reproduce the actual pattern. If you sell finished items online (Etsy, etc) please provide a link to the pattern and credit to me as the designer, thank you. I hope you enjoy this pattern! Materials – 350 yards size 4 worsted weight yarn (I used two skeins of Ivory Yarn Bee Denim in Color) Small amount of brown (nose), pink (cheeks and bow), black, and white (eyes) 4 mm crochet hook 14-inch round pillow form (stuffing can be used as a replacement) Scissors Tapestry needle Stitch marker Sewing pins (optional) Abbreviations – US terminology MC- Magic circle SC- Single crochet HDC- Half double crochet HDC INC – Half double crochet increase Sl st – Slip stitch St(s)- Stitch(es) Gauge – 6 rounds = 4-inch diameter Eyes – Make 2 With black Round 1: Create a magic circle with 8 HDC, sl st to the first HDC to join Round 2: Ch 1, HDC INC in each stitch around, sl st to the first HDC to join (16) Round 3: Ch 1, HDC in the same st, HDC INC in the next, repeat around, sl st to the first HDC to join (24) Fasten off leaving a long tail for sewing, with white yarn create a reflection by passing through a few stitches towards the outside of the eye. Cheeks – Make 2 With pink Round 1: Create a magic circle with 8 HDC, sl st to the first HDC to join Round 2: Ch 1, HDC INC in each stitch around, sl st to the first HDC to join (16) Round 3: Ch 1, HDC in the same st, HDC INC in the next, repeat around, sl st to the first HDC to join (24) Fasten off leaving a long tail for sewing Nose/Mouth Piece – Round 1: Create a magic circle with 8 HDC Round 2: HDC INC in each st (16) Round 3: HDC in the first st, HDC INC in the next, repeat around (24) Round 4: HDC in the first 2 sts, HDC INC in the next, repeat around (32) Round 5: HDC in the first 3 sts, HDC INC in the next, repeat around (40) Round 6: HDC in the first 4 sts, HDC INC in the next, repeat around (48) Fasten off leaving a long tail for sewing. With your black yarn create a ‘V’ in the center of your piece that is 8 stitches apart reaching out to the 4th round. Next, make a line straight down 3 rounds from the center to create a ‘Y’. Ears – With brown make 2 Round 1: Create a magic circle with 8 SC Rounds 2-3: SC around (8) Round 4: SC in the first stitch, SC INC in the next, repeat around (12) Round 5: SC around (12) Round 6: SC in the first 2 sts, SC INC in the next, repeat around (16) Round 7: SC around (16) Round 8: SC in the first 3 sts, SC INC in the next, repeat around (20) Rounds 9-13: SC around (20) Round 14: SC in the first 4 sts, SC INC in the next, repeat around (24) Round 15: SC around (24) Round 16: SC in the first 5 sts, SC INC in the next, repeat around (28) Round 17: SC around (28) Round 18: SC in the first 5 sts, INV DEC in the next, repeat around (24) Round 19: SC in the first 4 sts, INV DEC in the next, repeat around (20) Round 20: SC in the first 3 sts, INV DEC in the next, repeat around (16) Fasten off leaving a long tail for sewing. Bow – With pink chain 17 Row 1: HDC into the 2nd chain from your hook and in each chain across (16) Rows 2-5: HDC across (16) Fasten off and weave in your ends. Cut a strand approximately 12 inches long and use to wrap around the middle of your bow 4-5 times, secure in the back and use remaining tail to sew onto your pillow. Pillow Cover – Make 2 *Note – We will now be working in a continuous round without joining, I recommend using a stitch marker either at the beginning or end of each round. * Round 1: With ivory, create a magic circle with 8 HDC Round 2: HDC INC in each stitch around (16) Round 3: HDC in the first st, HDC INC in the next, repeat around (24) Round 4: HDC in the first 2 sts, HDC INC in the next, repeat around (32) Round 5: HDC in the first 3 sts, HDC INC in the next, repeat around (40) Round 6: HDC in the first 4 sts, HDC INC in the next, repeat around (48) Round 7: HDC in the first 5 sts, HDC INC in the next, repeat around (56) Round 8: HDC in the first 6 sts, HDC INC in the next, repeat around (64) Round 9: HDC in the first 7 sts, HDC INC in the next, repeat around (72) Round 10: HDC in the first 8 sts, HDC INC in the next, repeat around (80) Round 11: HDC in the first 9 sts, HDC INC in the next, repeat around (88) Round 12: HDC in the first 10 sts, HDC INC in the next, repeat around (96) Round 13: HDC in the first 11 sts, HDC INC in the next, repeat around (104) Round 14: HDC in the first 12 sts, HDC INC in the next, repeat around (112) Round 15: HDC in the first 13 sts, HDC INC in the next, repeat around (120) Round 16: HDC in the first 14 sts, HDC INC in the next, repeat around (128) Round 17: HDC in the first 15 sts, HDC INC in the next, repeat around (136) Round 18: HDC in the first 16 sts, HDC INC in the next, repeat around (144) Round 19: HDC in the first 17 sts, HDC INC in the next, repeat around (152) Round 20: HDC around (152) After finishing the first cover fasten off and weave in your ends. Do not fasten off the 2nd cover. Assembly – – Sew your eyes, cheeks and mouth piece onto one of your pillow covers. Optional: Use sewing pins to help hold them in place. o I started with my mouth piece first and place it centered just below the first round. Next, I sewed each of the eyes about two stitches above the mouth piece and about 7 stitches in between, feel free to add eyelashes as you go. Lastly, place the cheeks centered to the mouth and one stitch out. (Pictures for reference below.) – Next, sew the ears onto the pillow roughly 5-6 rounds above the eyes. I recommend sewing across the bottom and up the sides by half of an inch to add extra strength. – Place both covers with wrong sides together. SC around the edge making sure to go through each cover. When you are halfway across, insert your pillow form (or stuffing) and continue to SC around the remaining half. Fasten off and weave in your end. (If you are using stuffing as an alternative be sure to add extra stuffing just before closing to reach the level of firmness you would like.) – Lastly, we will add the wool between the ears. With ivory cut multiple strips of yarn approximately 7 inches long. You will need quite a few to fill in between the ears. · Taking 1 strand at a time and using your crochet hook, pull the strand through a stitch next to one of the ears to create a loop. (Pictures for reference below). · Next, pull your ends through the loop and pull tight. · Complete this step across the head to the other ear. I also added a few just under both ears for a full look. · Moving up two rounds complete another row of wool using the steps above. Trim as needed. – Lastly, sew your bow onto the desired ear. I hope you have a blast making your own llama pillow! Feel free to share your creation with us in our Grace and Yarn Crochet Group on Facebook, we’d love to see them!
